
The Final Fantasy XIV Dawntrail Arcadion Savage raids are now live with patch 7.05, and many in the community are considering it to be the hardest series of challenges in the MMO’s history. While some teams have completed the World First Race, within hours of the raid launch, completing it is still going to be very challenging for most casual players.
You will need to be properly prepared and it can take some hours of grind to get your party properly equipped with the right set of gear to take on he challenges.
Here is a guide on everything you need to know about completing the Arcadion Savage raid in Final Fantasy XIV Dawntrail.
How to start the Arcadian Savage raids in Final Fantasy XIV Dawntrail
To unlock the Savage difficulty of the Arcadion you will first be required to complete the base difficulty of the raids which will unlock Gabbro in Solution Nine (22.3, 17.1). You will then need to make your way through the basic Arcadia Championship fights and then speak to Gabbro.
After you burn through his dialogs, you will gain access to Savage Mode which will unlock all four fights at once and you and your party can take them on in any order.
Final Fantasy XIV Arcadion Savage AAC Light-Heavyweight M1: Black Cat timeline and guide
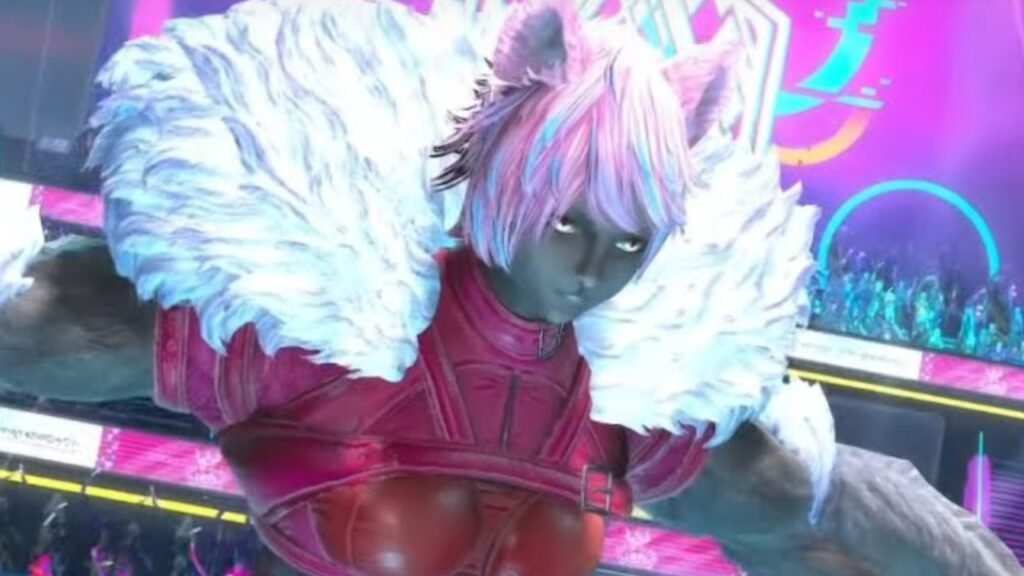
The Black Cat fight will last around 10 minutes and will have a minimum item level of 700. Most of her movesets will be based on her base Arcadion version, however, there will hit much harder and the channel time will also be significantly faster.
Here is a list of all of Black Cat’s cast, their timeline, and effects:
| Timer | Cast Name | Effects | Counter |
|---|---|---|---|
| 0:08 – 0:23 | Quadruple Crossing | Proximity-based cleaves on the four closest players. | To counter it make four players bait the initial cast inside the hitbox. Then make the other four take their place to juggle aggro. After the initial two hits, Black Cat will repeat the cleave attacks in the same direction that she is baited. You will need to dodge accordingly. You will die if you are hit twice in a row. |
| 0:27 – 0:32 | Biscuit Maker | A Two-hit combo that melts through tanks and comes with a debuff which can insta-kill if players take the second hit. | Tanks will need to draw this attack and then use invulnerability or swap with another party member to dodge the attack. |
| 0:47 – 0:50 | Nine Lives | Black Cat stores her next attack to a clone. | – |
| 0:52 – 1:01 | One-Two Paw | Deals two half-room cleaves hitting in the order Black Cat showed her claws. Leaves a bleeding debuff if you’re hit. | – |
| 1:02 – 1:05 | Soulshade | Spawns a clone that copies one of Black Cat’s moves. | – |
| 1:16 – 1:19 | Nine Lives | Black Cat stores her next attack to a clone. | – |
| 1:19 – 1:25 | One-Two Paw (Shade) | Her clones use two half-room cleaves hitting in the order Black Cat showed her claws. Leaves a bleeding debuff if you’re hit. If two clones use it together, the safe spot will be very small. | – |
| 1:23 – 1:28 | Double Swipe/Quadruple Swipe | Party stacks targeting both healers Party stacks targeting each role (DPS or Tank/Healer). | – |
| 1:30 – 1:33 | Soulshade | Spawns a clone that copies one of Black Cat’s moves. | – |
| 1:35 – 1:51 | Leaping Quadruple Crossing | Same as Quadruple Crossing, but she teleports to the telegraphed spot a second before the first cleaves. | – |
| 1:47 – 1:52 | Double Swipe/Quadruple Swipe (Shade) | Party stacks targeting both healers Party stacks targeting each role (DPS or Tank/Healer). | – |
| 1:57 – 2:02 | Bloody Scratch | AoE damage | – |
| 2:16 – 2:26 | Mouser | Black Cat damages the platforms, destroying any platform she hits twice. Gives a damage down debuff if you’re hit (and don’t fall). | – |
| 2:51 – 3:30 | Elevate & Eviscerate | Black Cat targets a player for four hits. It will be telegraphed by her clone’s glowing hand. The target will have a paw symbol above their heads and will be stunned upon hit. Black Cat’s attack also hits all cardinal platforms, so make sure that every party member is in a safe spot. | If she raises her glowing left fist, the attack will damage the platform. To avoid it stand on an undamaged platform. This will help you to safely bait her attack If she’s crouched and raising her glowing right fist, the target will be knocked up to the platform they’re facing. So to counter it you will need to stand in front of the undamaged platform. Make sure you’re looking at it before you’re hit. |
| 3:38 – 3:43 | Biscuit Maker | A Two-hit combo that melts through tanks and comes with a debuff which can insta-kill if players take the second hit. | Tanks will need to draw this attack and then use invulnerability or swap with another party member to dodge the attack. |
| 3:50 – 3:56 | Shockwave | Knock backs all players. Ignores Arm’s Lenght/Surecast. | You will need to position yourself toward the reconstructing platforms. This will help you land in a safe spot. |
| 3:50 – 4:00 | Grimalkin Gale | Spread attacks on all players. Can be cast alongside Shockwave. | – |
| 4:13 – 4:16 | Nine Lives | Black Cat stores her next attack to a clone. | – |
| 4:18 – 4:27 | Leaping One-Two Paw | Same as One-Two Paw, but she leaps to the marked spot before executing it. | – |
| 4:29 – 4:32 | Soulshade | Spawns a clone that copies one of Black Cat’s moves. | – |
| 4:34 – 4:37 | Nine Lives | Black Cat stores her next attack to a clone. | – |
| 4:39 – 4:55 | Leaping Quadruple Crossing | Same as Quadruple Crossing, but she teleports to the telegraphed spot a second before the first cleaves. | – |
| 4:56 – 4:59 | Soulshade | Spawns a clone that copies one of Black Cat’s moves. | – |
| 5:24 – 5:35 | Leaping Quadruple Crossing (Shade) | Same as Leaping Quadruple Crossing, but coming from a clone. The clones will leap in the same direction as Black Cat when she used the ability herself. | – |
| 5:18 – 5:26 | Nailchipper (1) | Four players of a role will get hit with a spread debuff during Leaping Quadruple Crossing (Shade). If they get hit by cleaves they will die. | If you are hit with the debuff, you will need to get away from Balck Cat as quickly as possible. Wait for some time for the debuff to resolve. Her second set of attacks will go out after her fourth Cleave. Make sure your heals are at the ready. |
| 5:26 – 5:35 | Nailchipper (2) | Same as above | Same as above |
| 5:54 – 5:58 | Leaping One-Two Paw (Shade) | Same as Leaping One-Two Paw, but executed by her clones. The clone will leap in the same direction as Black Cat when she uses the mechanic herself. | – |
| 5:50 – 5:56 | Tempestuous Tear | Line party stack targeting healers happening during Leaping One-Two Paw (Shade). | To counter it you will need to have some party members to the north and some to the south of the arena to dodge the cleaves. |
| 6:06 – 6:11 | Bloody Scratch | AoE damage. | – |
| 6:24 – 6:35 | Mouser | Black Cat damages the platforms, destroying any platform she hits twice. Gives a damage down debuff if you’re hit (and don’t fall). | – |
| 6:59 – 7:42 | Elevate & Eviscerate | Black Cat targets a player for four hits. It will be telegraphed by her clone’s glowing hand. The target will have a paw symbol above their heads and will be stunned upon hit. Black Cat’s attack also hits all cardinal platforms, so make sure that every party member is in a safe spot. | If she raises her glowing left fist, the attack will damage the platform. To avoid it stand on an undamaged platform. This will help you to safely bait her attack If she’s crouched and raising her glowing right fist, the target will be knocked up to the platform they’re facing. So to counter it you will need to stand in front of the undamaged platform. Make sure you’re looking at it before you’re hit. |
| 7:03 – 7:46 | Splintering Nails/Overshadow | She casts it during Elevate & Eviscerate 2. Line AoE on a random player of each role. | To counter it tanks will need to stick to the left facing the boss. Healers should keep to the middle while the DPS party members move to the right. Make sure the roles do not overlap with one other as one small mistake will wipe the entire party. |
| 7:51 -7:56 | Biscuit Maker | A Two-hit combo that melts through tanks and comes with a debuff which can insta-kill if players take the second hit. | Tanks will need to draw this attack and then use invulnerability or swap with another party member to dodge the attack. |
| 8:03 – 8:09 | Shockwave | Knock backs all players. Ignores Arm’s Lenght/Surecast. | You will need to position yourself toward the reconstructing platforms. This will help you land in a safe spot. |
| 8:03 – 8:14 | Grimalkin Gale | Spread attacks on all players. Can be cast alongside Shockwave. | – |
| 8:27 – 8:53 | Raining Cats | Two tethers appear and hit four times each. It will leave a debuff that kills the player if they’re hit by it two times. Each player takes the tether once, and another will replace them immediately. At the same time, Black Cat targets the closest and the farthest players for four sets of three-person stacks. | You can solve the first part of the attack by juggling the aggro in the following order: Tank – Healer – Melee – Ranged (THMR). For the second part of the attack, you will need to keep a light party closer to her and another set of players away to bait her attacks. |
| 9:08 – 9:21 | Predaceous Pounce | Black Cat dashes and pounces through the whole arena. She will immediately follow this move with a One-Two Paw. | – |
| 9:22 – 9:31 | One-Two Paw | Deals two half-room cleaves hitting in the order Black Cat showed her claws. Leaves a bleeding debuff if you’re hit. | – |
| 9:45 – 10:02 | Mouser (Enrage) | Black Cat damages the platforms, destroying any platform she hits twice. Gives a damage down debuff if you’re hit (and don’t fall). Enrage will destroy all platforms. | – |
It will take you and your party a while to get used to Black Cat’s movesets in Arcadion Savage. There are likely to be a lot of failed attempts at first, but you will eventually get a hang of the encounter in subsequent runs. Just make sure you have the proper gear and a balanced party composition.
Final Fantasy XIV Arcadion Savage AAC Light-Heavyweight M2: Honey B Lovely timeline and guide
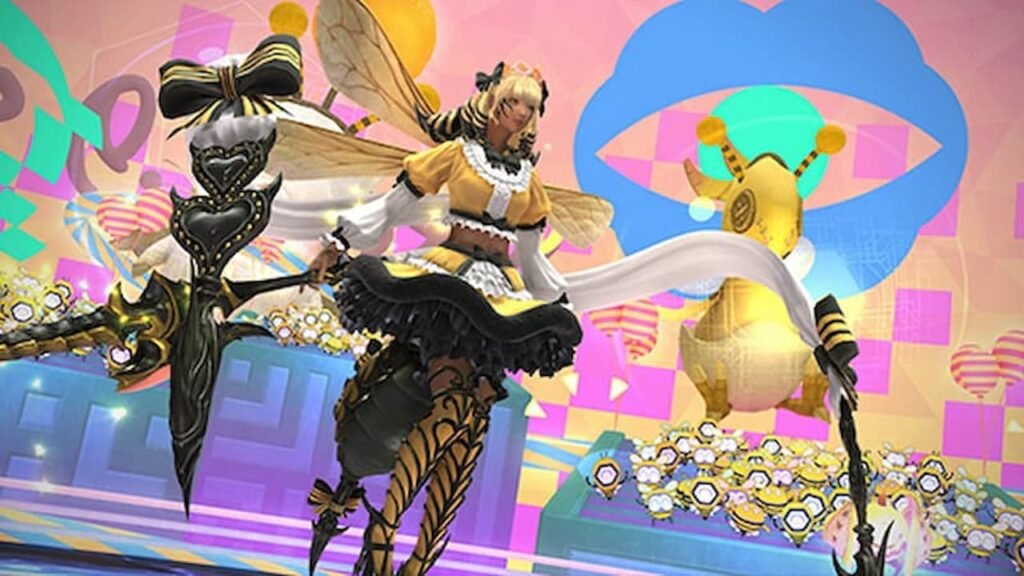
Honey B Lovely is going to be a bit more challenging than Black Cat in Arcadion Savage. Make sure you have a minimum item Level of 705. She has the same heart-based and poison attacks as her base Arcadion form, but in the Savage difficulty, the damage the moves do is taken up several notches.
This too is a 10-minute fight, and by the end of the encounter, she will go into an enrage as Black Cat does with her Mouser.
Here is a list of all of Honey B Lovely’s cast, their timeline, effects, and counters:
| Timer | Cast Name | Effect | Timer |
|---|---|---|---|
| 0:05 – 0:10 | Call Me Honey | AoE Damage | – |
| 0:12 – 0:17 | Drop of Venom/Splash of Venom (Cast) | Drop: Honey B Lovely will target a role (Tanks/Healers or DPS) with pair stacks. This will resolve at the end of one of her next attacks. Splash: Targets all players with spreads, which resolve at the end of one of her next attacks. | – |
| 0:23 – 0:28 | Honey Beeline/Tempting Twist | Beeline: Line AoE from her own hitbox. Drops Splinter puddles of honey around the room. Resolves Drop/Splash of Venom immediately after. Twist: AoE damage will circle around Honey B Lovely, keeping her safe from incoming damage. The move will drop Splinter puddles of honey around the room. Resolves Drop/Splash of Venom immediately after. | There will be four corners as safe spots. Move to them to avoid the move. |
| 0:33 | Splinter + Drop of Venom/Splash of Venom (Resolution) | Honey B Lovely will combine the three moves together. | Avoid the attack by moving o the safe spots. |
| 0:34 – 0:39 | Splash of Venom/Drop of Venom (Cast) | Drop: Honey B Lovely will target a role (Tanks/Healers or DPS) with pair stacks. This will resolve at the end of one of her next attacks. Splash: Targets all players with spreads, which resolve at the end of one of her next attacks. | – |
| 0:41 – 0:47 | Tempting Twist/Honey Beeline | Beeline: Line AoE from her own hitbox. Drops Splinter puddles of honey around the room. Resolves Drop/Splash of Venom immediately after. Twist: AoE damage will circle around Honey B Lovely, keeping her safe from incoming damage. The move will drop Splinter puddles of honey around the room. Resolves Drop/Splash of Venom immediately after. | There will be four corners as safe spots. Move to them to avoid the move. |
| 0:52 | Splinter + Splash of Venom/Drop of Venom (Resolution) | Honey B Lovely will combine the three moves together. | Avoid the attack by moving to the safe spots. |
| 0:55 – 0:59 | Killer Sting/Stinging Slash | Killer Sting: Shared Tank buster Stinging Slash: Double Tank buster, hitting everything behind both tanks. | – |
| 1:10 – 1:19 | Honey B Live: 1st Beat | She will deal high AoE damage that gives two hearts to four random players. Usually follows it up with a set of various mechanics that can inflict more hearts. | – |
| 1:22 – 1:28 | Centerstage Combo/Outerstage Combo | Centerstage: Honey B Lovely hits four corners around her, leaving four small slices inside her hitbox as safe spots. Immediately hits for a Cross AoE in the previously safe directions, then hits the same initial directions again, but leaving the area outside her hitbox as safe spots. Outerstage: Exactly the same as Centerstage Combo, but in the inverse order. Honey B Lovely alternates between them during her Beats. | Make sure to read the move that she is doing and make your way to the safe spots when she transitioning between the attacks. |
| 1:31 | Cross | AoE damage | – |
| 1:34 | Outerstage Combo/Centerstage Combo | Centerstage: Honey B Lovely hits four corners around her, leaving four small slices inside her hitbox as safe spots. Immediately hits for a Cross AoE in the previously safe directions, then hits the same initial directions again, but leaving the area outside her hitbox as safe spots. Outerstage: Exactly the same as Centerstage Combo, but in the inverse order. Honey B Lovely alternates between them during her Beats. | Make sure to read the move that she is doing and make your way to the safe spots when she transitioning between the attacks. |
| 1:38 – 2:12 | Love Me Tender (Towers) | Honey B Lovely will make towers appear which will inflict heart debuffs on all players if they are soaked. The soaking player will receive a heart. | Players who do not have an existing heart debuff should be the ones to soak the attack. |
| 2:13 – 2:16 | Loveseeker | Deals a huge AoE damage around her. | – |
| 2:26 – 2:30 | Love Me Tender (Hearts) | Spawns various hearts around the arena. The move also overlaps with Heartsick. | – |
| 2:38 | Heartsick | Honey B Lovely deals a AoE stack that inflicts four hearts to the players. | Each player will need to stack inside the AoE s that the hearts are distributed amongst them. |
| 2:43 – 2:49 | Outerstage Combo/Centerstage Combo | Centerstage: Honey B Lovely hits four corners around her, leaving four small slices inside her hitbox as safe spots. Immediately hits for a Cross AoE in the previously safe directions, then hits the same initial directions again, but leaving the area outside her hitbox as safe spots. Outerstage: Exactly the same as Centerstage Combo, but in the inverse order. Honey B Lovely alternates between them during her Beats. | Make sure to read the move that she is doing and make your way to the safe spots when she transitioning between the attacks. |
| 2:52 | Cross | AoE damage | – |
| 2:55 | Centerstage Combo/Outerstage Combo | Centerstage: Honey B Lovely hits four corners around her, leaving four small slices inside her hitbox as safe spots. Immediately hits for a Cross AoE in the previously safe directions, then hits the same initial directions again, but leaving the area outside her hitbox as safe spots. Outerstage: Exactly the same as Centerstage Combo, but in the inverse order. Honey B Lovely alternates between them during her Beats. | Make sure to read the move that she is doing and make your way to the safe spots when she transitioning between the attacks. |
| 3:02 – 3:07 | Honey B Finale | Ends the Beats phases. Will kill any player with four hearts | – |
| 3:17 – 3:21 | Killer Sting/Stinging Slash | Killer Sting: Shared Tank buster Stinging Slash: Double Tank buster, hitting everything behind both tanks. | – |
| 3:26 – 3:29 | Alarm Pheromones | Spawns bees around the arena that will cast Binding Love immediately. | – |
| 3:31 – 4:00 | Binding Love | Bees target the arena for line AoEs that knock you back if you’re hit. It has two variations: The first time it happens, the bees target a random player. During the second set, it will target fixed positions, leaving only four safe corners (excluding the middle) | The first part of the attack can be counted by aggroing Honey B Lovely and then pulling her south. For the second part, you just need to stand on one of the four safe corners to avoid the attack. |
| 4:05 – 4:14 | Honey B Live: 2nd Beat | High AoE damage that gives a heart to four random players. Usually follows it up with a set of various mechanics that can inflict more hearts. | – |
| 4:17 – 4:22 | Drop of Love/Spread Love (Cast) | Drop of Love: Same as Drop of Venom, but inflicting hearts Spread Love: Same as Splash of Venom, but inflicting hearts. | – |
| 4:28 – 4:32 | Love Me Tender (Puddles + Stack) | The boss will begin a series of moves that will inflict hearts on players. | All players will need to solve them finishing with exactly two hearts. |
| 4:33 – 4:44 | Heartstruck | Baited AoEs that inflict hearts on those hit by it. | Circle through the boss to avoid the attacks. |
| 4:40 | x2 Heartsick | Targets two zero-heart players for a 4-heart-inflicting AoE. | You will want to stack with another zero-heart player so both of you get two at the end. |
| 4:46 | Heartsore | Targets a one-heart players with a spread. | You will need to Stand in middle, then wait to see if you’re getting it. If you do, get away from the party to that you are the recipient of the entire move. |
| 4:47 | x2 Fracture (Towers) | Two towers that inflict hearts appear. They must be soaked by one-heart players. | You will need to wait to see if you’re a target for Heartsore. If you’re not, get a tower depending on your priority (Support North/West, DPS South/East). |
| 4:50 – 4:56 | Honey Beeline/Tempting Twist | Beeline: Line AoE from her own hitbox. Drops Splinter puddles of honey around the room. Resolves Drop/Splash of Venom immediately after. Twist: AoE damage will circle around Honey B Lovely, keeping her safe from incoming damage. The move will drop Splinter puddles of honey around the room. Resolves Drop/Splash of Venom immediately after. | There will be four corners as safe spots. Move to them to avoid the move. |
| 5:01 | Splinter + Drop of Love/Spread Love (Resolution) | Honey B Lovely will combine the three moves together. | Avoid the attack by moving to the safe spots. |
| 5:05 – 5:10 | Honey B Finale | Ends the Beats phases. Will kill any player with four hearts | – |
| 5:23 – 5:28 | Drop of Venom/Splash of Venom (Cast) | Drop: Honey B Lovely will target a role (Tanks/Healers or DPS) with pair stacks. This will resolve at the end of one of her next attacks. Splash: Targets all players with spreads, which resolve at the end of one of her next attacks. | – |
| 5:30 – 5:33 | Alarm Pheromones | Spawns bees around the arena that will cast Binding Love immediately. | – |
| 5:36 – 5:41 | Poison Sting | AoEs around the marked players that leave behind a puddle. Must be dropped on the outer safe spots of Binding Love. | – |
| 5:42 – 5:57 | Binding Love + Poison Sting | Combines two moves together | – |
| 6:02 | Binding Love | Bees target the arena for line AoEs that knock you back if you’re hit. It has two variations: The first time it happens, the bees target a random player. During the second set, it will target fixed positions, leaving only four safe corners (excluding the middle) | The first part of the attack can be counted by aggroing Honey B Lovely and then pulling her south. For the second part, you just need to stand on one of the four safe corners to avoid the attack. |
| 6:07 | Binding Love + Bee Sting | Combines two moves together Bee Sting: Light party stacks on healers. | – |
| 6:11 – 6:16 | Killer Sting/Stinging Slash | Killer Sting: Shared Tank buster Stinging Slash: Double Tank buster, hitting everything behind both tanks. | – |
| 6:22 – 6:28 | Honey Beeline/Tempting Twist | Beeline: Line AoE from her own hitbox. Drops Splinter puddles of honey around the room. Resolves Drop/Splash of Venom immediately after. Twist: AoE damage will circle around Honey B Lovely, keeping her safe from incoming damage. The move will drop Splinter puddles of honey around the room. Resolves Drop/Splash of Venom immediately after. | There will be four corners as safe spots. Move to them to avoid the move. |
| 6:33 | Splinter + Drop of Venom/Splash of Venom (Resolution) | Honey B Lovely will combine the three moves together. | Avoid the attack by moving to the safe spots. |
| 6:44 – 6:52 | Honey B Live: 3rd Beat | High AoE damage that inflicts all players with the Poison ‘n’ Pop debuff. Poison ‘n’ Pop will explode in a huge area once it expires, killing players that overlap. | They have a longer and a smaller duration, which are both solved differently: Smaller debuffs must explode in the four cardinals, then grab the towers after the second Combo resolves. Longer debuffs must first grab the towers, and then solve their debuffs on the same spot as their partner did. |
| 6:54 – 6:59 | Drop of Love/Spread Love (Cast) | Drop of Love: Same as Drop of Venom, but inflicting hearts Spread Love: Same as Splash of Venom, but inflicting hearts. | – |
| 7:01 – 7:08 | Centerstage Combo/Outerstage Combo | Centerstage: Honey B Lovely hits four corners around her, leaving four small slices inside her hitbox as safe spots. Immediately hits for a Cross AoE in the previously safe directions, then hits the same initial directions again, but leaving the area outside her hitbox as safe spots. Outerstage: Exactly the same as Centerstage Combo, but in the inverse order. Honey B Lovely alternates between them during her Beats. | Make sure to read the move that she is doing and make your way to the safe spots when she transitioning between the attacks. |
| 7:11 | Cross | AoE damage- | |
| 7:14 | Outerstage Combo/Centerstage Combo | Centerstage: Honey B Lovely hits four corners around her, leaving four small slices inside her hitbox as safe spots. Immediately hits for a Cross AoE in the previously safe directions, then hits the same initial directions again, but leaving the area outside her hitbox as safe spots. Outerstage: Exactly the same as Centerstage Combo, but in the inverse order. Honey B Lovely alternates between them during her Beats. | Make sure to read the move that she is doing and make your way to the safe spots when she transitioning between the attacks. |
| 7:18 | Poison ‘n’ Pop (1st set) | Debuff which will explode in a huge area once it expires, killing players that overlap. | They have a longer and a smaller duration, which are both solved differently: Smaller debuffs must explode in the four cardinals, then grab the towers after the second Combo resolves. Longer debuffs must first grab the towers, and then solve their debuffs on the same spot as their partner did. |
| 7:22 | x4 Fracture (Towers) | Two towers that inflict hearts appear. They must be soaked by one-heart players. | You will need to wait to see if you’re a target for Heartsore. If you’re not, get a tower depending on your priority (Support North/West, DPS South/East). |
| 7:21 – 7:27 | Outerstage Combo/Centerstage Combo | Centerstage: Honey B Lovely hits four corners around her, leaving four small slices inside her hitbox as safe spots. Immediately hits for a Cross AoE in the previously safe directions, then hits the same initial directions again, but leaving the area outside her hitbox as safe spots. Outerstage: Exactly the same as Centerstage Combo, but in the inverse order. Honey B Lovely alternates between them during her Beats. | Make sure to read the move that she is doing and make your way to the safe spots when she transitioning between the attacks. |
| 7:30 | Cross | AoE damage | – |
| 7:34 | Centerstage Combo/Outerstage Combo | Centerstage: Honey B Lovely hits four corners around her, leaving four small slices inside her hitbox as safe spots. Immediately hits for a Cross AoE in the previously safe directions, then hits the same initial directions again, but leaving the area outside her hitbox as safe spots. Outerstage: Exactly the same as Centerstage Combo, but in the inverse order. Honey B Lovely alternates between them during her Beats. | Make sure to read the move that she is doing and make your way to the safe spots when she transitioning between the attacks. |
| 7:39 | Poison ‘n’ Pop (2nd set) | Debuff which will explode in a huge area once it expires, killing players that overlap. | They have a longer and a smaller duration, which are both solved differently: Smaller debuffs must explode in the four cardinals, then grab the towers after the second Combo resolves. Longer debuffs must first grab the towers, and then solve their debuffs on the same spot as their partner did. |
| 7:42 | x4 Fracture (Towers) | Two towers that inflict hearts appear. They must be soaked by one-heart players. | You will need to wait to see if you’re a target for Heartsore. If you’re not, get a tower depending on your priority (Support North/West, DPS South/East). |
| 7:46 – 7:52 | Tempting Twist/Honey Beeline | Beeline: Line AoE from her own hitbox. Drops Splinter puddles of honey around the room. Resolves Drop/Splash of Venom immediately after. Twist: AoE damage will circle around Honey B Lovely, keeping her safe from incoming damage. The move will drop Splinter puddles of honey around the room. Resolves Drop/Splash of Venom immediately after. | Move tot he four safe spots |
| 7:56 | Splinter + Drop of Love/Spread Love (Resolution) | Combines moves | Move to the safe spots |
| 7:59 – 8:04 | Honey B Finale | Ends the Beats phases. Will kill any player with four hearts | – |
| 8:14 – 8:19 | Killer Sting/Stinging Slash | Killer Sting: Shared Tank buster Stinging Slash: Double Tank buster, hitting everything behind both tanks. | – |
| 8:30 – 8:35 | Rotten Heart | Honey B Lovely inflicts all players with four sets of Beeloved Venom: α and Beloved Venom: β debuffs, with timers of 11 seconds, 27 seconds, 43 seconds and 1 minute. | Players must be in their clock positions once it casts. The 11-second pair of α and β must encounter at the center to cleanse the debuff as soon as possible. If they take too long to meet, the next Call Me Honey, the debuff will wipe the party. The lowest-duration debuffs must always meet as soon as they’re healed from the previous AoE. So make sure to pay attention to your timer and to your HP to know if it’s your turn. |
| 8:46 – 8:51 | Call Me Honey | AoE Damage | – |
| 9:04 – 9:09 | Call Me Honey | AoE Damage | – |
| 9:21 – 9:26 | Call Me Honey | AoE Damage | – |
| 9:38 – 9:43 | Call Me Honey | AoE Damage | – |
| 9:55 – 10:05 | Sheer Heart Attack (Enrage) | Honey B Lovely’s Enrage mode | – |
In Savage difficulty, Honey B Lovely will often alternate the order of some of her attacks, so even if the above timings are usually reliable, there might be moments when she can surprise you. Hence, unlike Black Cat you and your party will need to be on your toes when completing the Mw Arcadion Savage raid.
Final Fantasy XIV Arcadion Savage AAC Light-Heavyweight M3: Brute Bomber timeline and guide

The Brute Bomber has a much harder DPS check than Black Cat and Honey B Lovely. You will need a minimum item level of 710 to be able to complete the M3 raid, and compared to his normal version, the boss will hit much harder.
However, on the plus side, he will not be dashing or moving around all that much when compared to the base raid version. This makes it much easier for melee players to focus their DPS on him.
Here is a list of all of Brute Bomber’s cast, their timeline, effects, and counters:
| Timer | Cast Name | Effects | Counter |
|---|---|---|---|
| 0:06 – 0:11 | Brutal Impact (x4) | AoE damage. Increases the number of hits by two each time he uses Doping Draught. | – |
| 0:16 – 0:21 | Knuckle Sandwich (x4) | Shared Tankbuster. Increases the number of hits by two each time he uses Doping Draught. | |
| 0:31 – 0:38 | Quadruple Lariat/Octuple Lariat (Far) | Quadruple: AoE around the boss finishing with a pairs stack. Stack far away from his hitbox. Octuple: AoE around the boss finishing with a line spread. | If Brute Bomber is glowing, the safe zone is the opposite, so you and your pair stack close to him |
| 0:41 – 0:49 | Quadroboom/Octoboom Dive (Far) | Quadroboom: Brute Bomber jumps to the location he’s facing, causing proximity damage, and finishes with a pair stack. If he is glowing, he causes a knockback instead. Octoboom: Brute Bomber jumps to the location he’s facing, causing proximity damage, and finishes with a spread. If he is glowing, he causes a knockback instead. | You will need to locate yourself on the clock spot which is away from the hitbox. If Brute Bomber is glowing then the safe zone will be located to the opposite side. You might want to stay close to the boss to avoid the hit. |
| 0:52 | Quadroboom/Octoboom Dive (Spread or Stack) | Same as above, but this time he will spread or stack the effect | You will need to locate yourself on the clock spot which is away from the hitbox. If Brute Bomber is glowing then the safe zone will be located to the opposite side. You might want to stay close to the boss to avoid the hit. |
| 0:55 – 1:00 | Brutal Impact (x4) | AoE damage. Increases the number of hits by two each time he uses Doping Draught. | – |
| 1:12 – 1:16 | Barbarous Barrage (Cast) | Brute Bomber summons seven towers that must be soaked by a certain amount of players. They also inflict a knockback effect, which can be used to solve the next tower. | – |
| 1:28 | Barbarous Barrage (1st set) | Two towers require four persons. | A good way of solving it will be to assign all tank/melees to north/west and healers/ranged to south/east. |
| 1:31 | Barbarous Barrage (2nd set) | Four towers require two persons. | After the first tower is down the Dives pairs are knocked back and will need to soak the tower on the opposite side. Here Group 1 faces left, Group 2 faces right. |
| 1:34 | Barbarous Barrage (Final set) | The final middle tower requires all eight players. | The final tower will be soaked by all players. Just be away of his murderous Mist attack and make your way behind him to avoid the hit. |
| 1:30 – 1:36 | Murderous Mist | A poison-inflicting attack that only leaves a small area behind the boss as a safe zone. | During Chain Deathmatch 2, you will have no other choice than to take the poison to survive. |
| 1:45 – 1:49 | Doping Draught | Brute Bomber drinks illicit substances during the fight, increasing his damage and the number of hits for his AoE and tankbusters. Can’t be removed and lasts for the whole fight. | – |
| 2:17 – 2:24 | Quadruple Lariat/Octuple Lariat (In) | Quadruple: AoE around the boss finishing with a pairs stack. Stack far away from his hitbox. Octuple: AoE around the boss finishing with a line spread. | If Brute Bomber is glowing, the safe zone is the opposite, so you and your pair stack close to him |
| 2:27 – 2:35 | Quadroboom/Octoboom Dive (In) | Quadroboom: Brute Bomber jumps to the location he’s facing, causing proximity damage, and finishes with a pair stack. If he is glowing, he causes a knockback instead. Octoboom: Brute Bomber jumps to the location he’s facing, causing proximity damage, and finishes with a spread. If he is glowing, he causes a knockback instead. | You will need to locate yourself on the clock spot which is away from the hitbox. If Brute Bomber is glowing then the safe zone will be located to the opposite side. You might want to stay close to the boss to avoid the hit. |
| 2:38 | Quadroboom/Octoboom Dive (Spread or Stack) | Same as above, but this time he will spread or stack the effect | You will need to locate yourself on the clock spot which is away from the hitbox. If Brute Bomber is glowing then the safe zone will be located to the opposite side. You might want to stay close to the boss to avoid the hit. |
| 2:41 – 2:46 | Brutal Impact (x6) | AoE damage. Increases the number of hits by two each time he uses Doping Draught. | – |
| 2:52 – 2:57 | Knuckle Sandwich (x6) | Shared Tankbuster. Increases the number of hits by two each time he uses Doping Draught. | – |
| 3:12 – 3:16 | Tag Team | Brute Bomber summons two clones. One of them will be linked to you during Chain Deathmatch. | As only you can see the chain. Remember which clone you’re tethered to. |
| 3:18 – 3:25 | Chain Deathmatch | The clone links a chain to you. | You must take a hit from that clone (and that clone only) to survive the mechanic. |
| 3:28 – 3:34 | Lariat Combo (Chain 1) | Brute Bomber dashes in front of him, hitting the direction where his fist is glowing. *If done during Chain Deathmatch, you must take damage from the clone you’re linked to | – |
| 3:38 | Lariat Combo (Chain 2) | After the first part he immediately dashes back, so check his fist again after dodging the first one. *If done during Chain Deathmatch, you must take damage from the clone you’re linked to | During the second hit the safe zone is always the place where both clones landed during the first dash. |
| 3:40 – 3:47 | Quadruple/Octuple Lariat | Quadruple: AoE around the boss finishing with a pairs stack. Stack far away from his hitbox. Octuple: AoE around the boss finishing with a line spread. | If Brute Bomber is glowing, the safe zone is the opposite, so you and your pair stack close to him |
| 3:49 – 3:54 | Brutal Impact (x6) | AoE damage. Increases the number of hits by three each time he uses Doping Draught. | – |
| 4:10 – 4:14 | Final Fusedown | Brute Bomber summons four long-fused bombs and four short-fused bombs, while also inflicting all players with Self Destruct with the same fuses. | You will need to locate the corner where there are three long-fused bombs. You will then need to use it as the new north for this mechanic. |
| 4:26 | Self Destruct + Explosion | Self Destruct: Hits all players of a role with a short fuse, and the other role with a long fuse. Explosion:Low damage, but if you take any explosion other than yours, you die. | – |
| 4:31 | Self Destruct + Explosion | Self Destruct: Hits all players of a role with a short fuse, and the other role with a long fuse. Explosion: Low damage, but if you take any explosion other than yours, you die. | – |
| 4:31 – 4:39 | Quadroboom/Octoboom Dive | Quadroboom: Brute Bomber jumps to the location he’s facing, causing proximity damage, and finishes with a pair stack. If he is glowing, he causes a knockback instead. Octoboom: Brute Bomber jumps to the location he’s facing, causing proximity damage, and finishes with a spread. If he is glowing, he causes a knockback instead. | You will need to locate yourself on the clock spot which is away from the hitbox. If Brute Bomber is glowing then the safe zone will be located to the opposite side. You might want to stay close to the boss to avoid the hit. |
| 4:42 | Quadroboom/Octoboom Dive (Spread or Stack) | Same as above, but this time he will spread or stack the effect | You will need to locate yourself on the clock spot which is away from the hitbox. If Brute Bomber is glowing then the safe zone will be located to the opposite side. You might want to stay close to the boss to avoid the hit. |
| 4:54 – 4:58 | Fusefield | Brute Bomber summons four long fuses and four short fuses, inflicting four players with 25s and 43s debuffs. Short debuffs go on short fuses and vice versa. | You must detonate the fuses one at a time. |
| 5:01 – 5:04 | Bombarian Flame | A set of various hits that deal high AoE damage. | The only safe spot will be inside his hitbox, so run back |
| 5:42 | Mana Explosions (debuff ends) | Fusefield debuff ends | – |
| 5:50 – 5:55 | Knuckle Sandwich (x6) | Shared Tankbuster. Increases the number of hits by two each time he uses Doping Draught. | – |
| 6:03 – 6:12 | Doping Draught | Brute Bomber drinks illicit substances during the fight, increasing his damage and the number of hits for his AoE and tankbusters. Can’t be removed and lasts for the whole fight. | – |
| 6:25 – 6:31 | Quadruple/Octuple Bombarian Special (x7) | He finishes with a full-body splash which knocks back players and resolves the final mechanic according to the move’s full name. If it’s Octuple Bombarian Special, it ends with a spread. If it’s Quadruple Bombarian Special, it’ll be a pair stack | – |
| 6:41 | Bombarian Special (Out) | A set of various hits that deal high AoE damage. | The only safe spot will be inside his hitbox, so run back |
| 6:43 | Bombarian Special (In) | A set of various hits that deal high AoE damage. | The only safe spot will be inside his hitbox, so run back |
| 6:52 | Bombarian Special (Knockback) | A set of various hits that deal high AoE damage. | The only safe spot will be inside his hitbox, so run back |
| 6:55 | Bombariboom | A set of various hits that deal high AoE damage. | The only safe spot will be inside his hitbox, so run back |
| 7:03 – 7:07 | Fuses of Fury | Combines the bombs from Final Fusedown with Chain Deathmatch, but he also chains himself to you. Follows it up with a Dive. | Solve the bombs by heading to the long-fused first, then solve the Lariat Combos with the clones. Make sure you are hit with poison to solve this part of his mechanic. |
| 7:09 – 7:13 | Tag Team | Brute Bomber summons two clones. One of them will be linked to you during Chain Deathmatch. | As only you can see the chain. Remember which clone you’re tethered to. |
| 7:16 – 7:23 | Chain Deathmatch | The clone links a chain to you. | You must take a hit from that clone (and that clone only) to survive the mechanic. |
| 7:26 | Self Destruct | Hits all players of a role with a short fuse, and the other role with a long fuse. | – |
| 7:31 | Self Destruct | Hits all players of a role with a short fuse, and the other role with a long fuse. | – |
| 7:30 – 7:38 | Murderous Mist + Lariat Combo (Chain 1) | Combines two attacks together | – |
| 7:42 | Lariat Combo (Chain 2 + Poison) | Combines two attacks together | |
| 7:44 – 7:51 | Quadroboom Dive/Octoboom Dive | Quadroboom: Brute Bomber jumps to the location he’s facing, causing proximity damage, and finishes with a pair stack. If he is glowing, he causes a knockback instead. Octoboom: Brute Bomber jumps to the location he’s facing, causing proximity damage, and finishes with a spread. If he is glowing, he causes a knockback instead. | You will need to locate yourself on the clock spot which is away from the hitbox. If Brute Bomber is glowing then the safe zone will be located to the opposite side. You might want to stay close to the boss to avoid the hit. |
| 7:55 | Quadroboom/Octoboom Dive (Spread or Stack) | Same as above bu the Brute Bomber spreads or Stacks the effect. | Same as above |
| 7:59 – 8:04 | Brutal Impact (x8) | AoE damage. Increases the number of hits by two each time he uses Doping Draught. | – |
| 8:13 – 8:18 | Knuckle Sandwich (x8) | Shared Tankbuster. Increases the number of hits by two each time he uses Doping Draught. | – |
| 8:33 – 8:37 | Fuse or Foe | Combines Inferno Spin with various Explosive Rain AoEs. Also inflicts. Self Destruct on players once again. | You will need to dodge everything while heading to your assigned positions to avoid clipping each other. |
| 8:46 | Infernal Spin + Explosive Rain | Hits the whole arena with a cone fire attack. | Brute Bomber only hits every corner once, so whichever place he already hit is guaranteed to be safe |
| 8:58 | Explosion | Starts out as a slow-exploding AoE zone but expands across the room, leaving small safe spaces for movement. | – |
| 9:03 | Explosion | Starts out as a slow-exploding AoE zone but expands across the room, leaving small safe spaces for movement. | – |
| 9:01 – 9:08 | Quadruple/Octuple Lariat (Out or In) | Quadruple: AoE around the boss finishing with a pairs stack. Stack far away from his hitbox. Octuple: AoE around the boss finishing with a line spread. | If Brute Bomber is glowing, the safe zone is the opposite, so you and your pair stack close to him |
| 9:11 – 9:16 | Brutal Impact (x8) | Brute Bomber summons seven towers that must be soaked by a certain amount of players. They also inflict a knockback effect, which can be used to solve the next tower. | – |
| 9:31 – 9:35 | Barbarous Barrage (Cast) | Brute Bomber summons seven towers that must be soaked by a certain amount of players. They also inflict a knockback effect, which can be used to solve the next tower. | |
| 9:47 | Barbarous Barrage | Two towers require four persons. | A good way of solving it will be to assign all tank/melees to north/west and healers/ranged to south/east. |
| 9:50 | Barbarous Barrage | Four towers require two persons. | After the first tower is down the Dives pairs are knocked back and will need to soak the tower on the opposite side. Here Group 1 faces left, Group 2 faces right. |
| 9:53 | Barbarous Barrage | The final middle tower requires all eight players. | The final tower will be soaked by all players. Just be away of his murderous Mist attack and make your way behind him to avoid the hit. |
| 9:50 – 9:56 | Lariat Combo (Dash 1) | Brute Bomber dashes in front of him, hitting the direction where his fist is glowing. *If done during Chain Deathmatch, you must take damage from the clone you’re linked to | = |
| 10:00 | Lariat Combo (Dash 2) | After the first part he immediately dashes back, so check his fist again after dodging the first one. *If done during Chain Deathmatch, you must take damage from the clone you’re linked to | During the second hit the safe zone is always the place where both clones landed during the first dash. |
| 10:10 – 10:15 | Knuckle Sandwich (x8) | Shared Tankbuster. Increases the number of hits by two each time he uses Doping Draught. | – |
| 10:34 – 10:38 | Doping Draught | Brute Bomber drinks illicit substances during the fight, increasing his damage and the number of hits for his AoE and tankbusters. Can’t be removed and lasts for the whole fight. | – |
| 10:51 – 10:57 | Special Bombarian Special (x6) | A set of various hits that deal high AoE damage. | The only safe spot will be inside his hitbox, so run back |
| 11:07 | Special Bombarian Special (Out) | A set of various hits that deal high AoE damage. | The only safe spot will be inside his hitbox, so run back |
| 11:10 | Special Bombarian Special (In) | A set of various hits that deal high AoE damage. | The only safe spot will be inside his hitbox, so run back |
| 11:18 | Special Bombarian Special (Enrage) | A set of various hits that deal high AoE damage. He will be in a hard enraged state at this point. | The only safe spot will be inside his hitbox, so run back |
Brute Bomber will be using Doping Draught multiple times throughout the encounter. He will use it to increase the number of hits on his abilities as well as the damage that they do. By the end of the encounter most of his moves will have x8 modifiers.
Best way to del with Savage Arcadion’s M3 encounter will be to access the clockspots for his spread and stack attacks. Make sure to keep swapping partners between Dives and help the melee characters in the party have a higher DPS uptime.
Note: The article is a work in progress and we will update it with the M4 Final Fantasy XIV Dawntrail Arcadion Savage raids when we have more information on them.