
Steam‘s in-built game recording feature is finally out of beta and has rolled out worldwide on November 6, 2024. This new addition to Steam is robust and packed with a ton of useful features that can outshine other recording apps in the market.
The best thing about this feature is it’s fully compatible with Steam Deck, which makes recording gameplay videos on the go a lot easier.
Contents:
How to record videos using Steam game recording
The first and foremost thing you need to make sure is your Steam client is updated to the latest version. To check that, simply click on the Steam logo on the top left of the client and then Check for Steam Client Updates.
Once you’ve sorted that, follow the steps listed below:
- Open up any game on Steam.
- Press Shift + Tab to open up the Steam overlay.
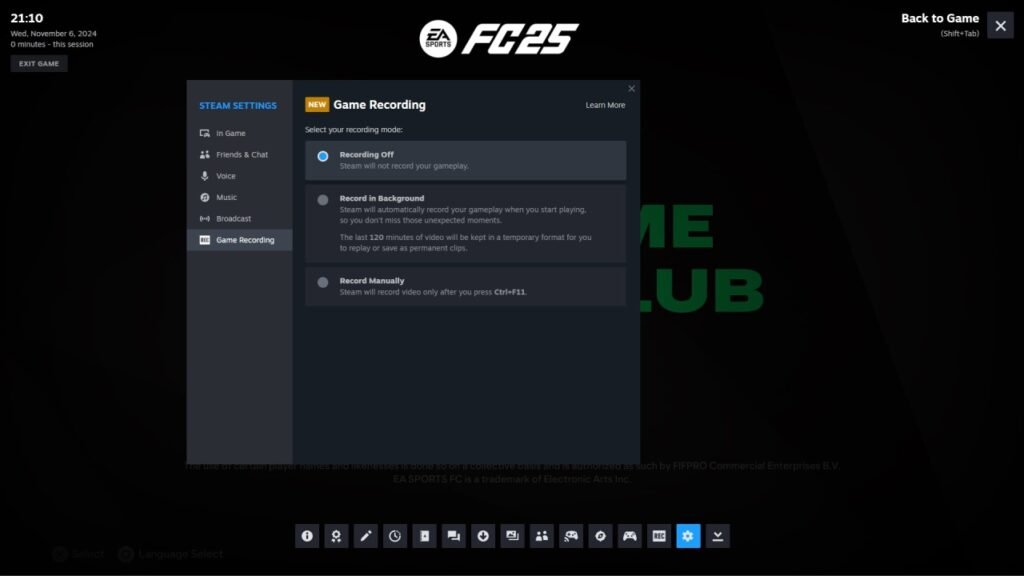
- Click on the Recording button (third one from the right) from the options available below.
- You can either choose to record gameplay in the background or manually.
If you choose the manual option, press Ctrl + F11 to start recording gameplay. And when you’re done and want to stop the recording, simply press Ctrl + F12.
Under the game recording section in the settings, you can also choose the frame rates and dimensions of the videos. So, in case you want to record smooth gameplay videos at 4K60FPS, you have the option to do that.
How to change the Steam game recording folder
By default, the recordings folder will be your C Drive. To change that, simply:
- Head over to the Steam settings.
- Click on Game Recording.
- Scroll down to locate the Recordings Folder section.
- Click on the Change folder button and select your desired location.
- To complete the process, Steam will ask for a restart – do that and you’re done.
Be sure you’re doing this before hopping into any multiplayer match. You cannot change the recording folder once a game is already running (goes for both single-player and multiplayer games).
How to save a recorded clip on Steam
To save a recorded clip on Steam, follow the steps below:
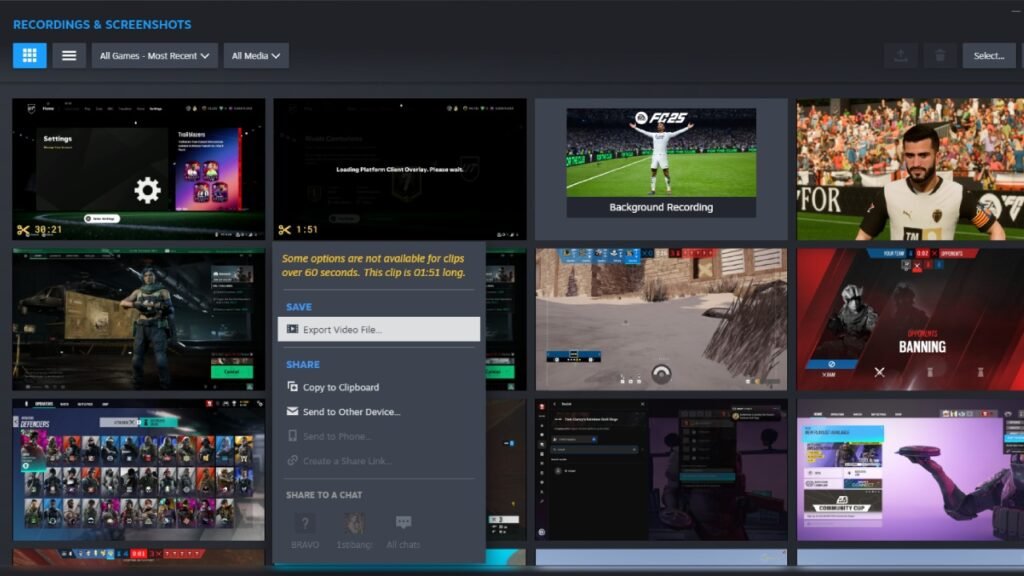
- Click on the View option on the top left corner of the screen.
- Then click on the Recordings & Screenshots option present at the bottom of the drop-down menu.
- Once the gallery opens, right-click on any clip, press Share, and click on the Export Video File option.
- Select all the export settings as per your liking and save it to your PC or Steam Deck.
Make sure your clips are not more than 60 seconds in length. If your clip goes beyond the 6-second marl, trim it down and then save it in your system.