
Equipments are the hardest pick-up to decide on in Risk of Rain 2. All other item types stack indefinitely regardless of rarity, while Orange items have to compete against each other for a single Equipment slot. This is precisely where a Risk of Rain 2 Equipment tier list helps, especially if you are a newcomer to this roguelite.
By definition, it is harder to execute a pre-planned build fully in roguelites than in other genres of gaming. You generally have to roll with the punches and scrape together whatever synergy is possible between items you get. A definitive Risk of Rain 2 tier list is therefore hard to make for Equipment.
We will rank all available Equipment in the base game and Survivors of The Void based on how independently impactful they are. This also includes the four Lunar (Blue) Equipment you can get.
Contents
Complete Risk of Rain 2 Equipment tier list (patch 1.2.4)
This Risk of Rain 2 tier list ranks all 38 items you can put on the Equipment slot – including all the Orange items, as well as the 4 Lunar (Blue) ones you can get. However, this does not include the 7 Elite Equipment (Essences) you can get – which are technically passives.
S-tier
Feels like cheating.
Like many other roguelites, acquiring the right items widens the avenue to godhood in this game. Therefore, the S-tier for this Risk of Rain 2 tier list is reserved for Equipments that allow you to cheese the item economy.
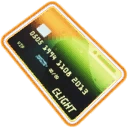 | Executive Card | This makes every multishop a three-for-one bonanza. Combined with the Shipping Request form item, Executive Card is arguably the best Equipment you can get in Risk of Rain 2. |
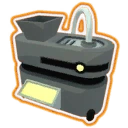 | Recycler | The ability to reroll even guaranteed legendaries is peerless in Risk of Rain 2. Absolute game-changer. |
 | Trophy Hunter’s Tricorn | A free insta-kill on any boss of your choosing, no strings attached. The ‘tradeoff’ is that it gets consumed upon a single use – at which point you can simply replace it with another Equipment. |
A-tier
Take names, kick Aurelionite.
The A-tier for this Risk of Rain 2 tier list is for Equipments that are best at the basics, i.e. dealing damage – or, for more defensive builds, surviving. No matter if item RNG has been on your side in a given run, you can expect these Equipments to deliver where it counts.
| Gnarled Woodsprite | Arguably the best healing Equipment in Risk of Rain 2. Extra points if you are running a healing-oriented build in the Drizzle or Rainstorm Difficulty. | |
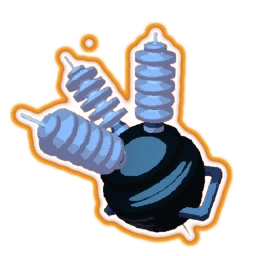
 | Preon Accumulator | The cooldown time might not look particularly servicable. Yet, no other Risk of Rain 2 can fix your bossing needs as simply and comprehensively as Preon Accumulator. |
 | Royal Capacitator | Seasoned Risk of Rain 2 fans will have seen this coming. After all, how do you beat 3000% damage nuke on a 20-second cooldown? Once you get used to the activation delay, this is almost as good as a single-target Preon Accumulator. |
B-tier
Can carry you (conditions apply).
B-tier Equipments in this Risk of Rain 2 tier list can be good on most runs, but some assembly is required.
 | Disposable Missile Launcher | An overall good choice for a pure DPS Equipment, but not the best in that category. |
 | Forgive Me Please | If you manage to stack on-hit effects, Forgive Me Please can turn into best-in-slot Equipment for Risk of Rain 2. On the flip side, it becomes Scarpper-tier without on-hit effects. |
 | Glowing Meteorite (Lunar) | With some good positioning, this is actually a decent DPS Equipment. However, for a co-op sesh, scrap it if you don’t want to lose friends. |
 | Goobo Jr. | After a few much-needed buffs, Goobo Jr. can help out quite a lot these days. Depending on your build, it can go up or down a few tiers. Gear up for a tough Mithrix second phase for solo runs, though. |
 | Jade Elephant | While not as good as 5 second of i-frames, 5 seconds of 85% damage reduction is nothing to scoff at. |
 | Remote Caffeinator | A pocket Captain-nuke that also provides extra utilities. This Equipment is a keeper if you also have Fireworks and Squid Polyps stacks. |
 | Sawmerang | This can be an A-tier damage Equipment against all Risk of Rain 2 enemies that have big hitboxes. The issues are twofold. One, it is very hard to consistently target smaller monsters. Two, it is impossible to target flying ones. |
 | Spinal Tonic (Lunar) | Is Spinal Tonic worth keeping for a whole run? Well, that depends. Do you like gambling? The writer of this article sure does. (Here at Backdash, we do not endorse gamification of gambling; nor are we associated with any form of agenda promoting Spinal Tonic consumption.) |
C-tier
One for the road, but won’t take you home.
The usage you get out of Equipment listed under this tier will vary wildly. All too often, the potential to utilize these Equipments will be gated behind very specific item builds. In other words, these can only be considered ‘good’ for Artifact of Command runs.
 | Blast Shower | The dispel itself is not enough to make Blast Shower slottable, its real power lies in the ability to reset cooldowns on Bands. If you can get that exploit going, this Equipment should go up two tiers. |
 | Foreign Fruit | Placing the Foreign Fruit on a Risk of Rain 2 tier list is a delicate exercise – because its utility largely depends on your playstyle. Depending on how hard you need a free instant heal in the middle of fight, it can be Scrapper-tier or S-tier. We opt to put it in the C-tier from the standpoint of offense-centric itemization. |
 | Helfire Tincture (Lunar) | The textbook example of a Risk of Rain 2 Equipment that only works with an extremely specific build. It may do more harm than good otherwise. |
 | Milky Chrysalis | Much like Eccentric Vase, it gives you Pillar-skipping shenanigans on any class. Unlike the Eccentric Vase, it actually has good uses even outside of it. |
 | Ocular HUD | Early-game, guaranteed criticals for a duration makes for a S-tier Equipment in Risk of Rain 2. However, as your default critical chance closes in on 40%, Ocular HUD falls off hard in slottability. |
 | Super Massive Leech | The only life-stealing Equipment in Risk of Rain 2. Surprisingly, in a game where you put out a lot of damage as your only means to get ahead, Super Massive Leech is still a downgrade from Gnarled Woodsprite as a healing option. |
 | Volcanic Egg | As a mobility tool early on, it is easily an A-tier Equipment. However, the further you go into the run, the bigger the ask: that is, the risk of accidentally putting yourself in perilous positions. |
Scrapper-tier
You’re getting rid of this… right?
The Scrapper-tier is self-explanatory. These items provide too little to ever take up your Equipment space. Nevertheless, you can pick these up and put them in the Scrapper for a free item later.
 | Eccentric Vase | The only consistent use case for the Quantum Tunnel is as a Pillar-skip for any class. You would not want to dedicate an Equipment slot to this end even if you are speedrunning Risk of Rain 2. |
 | Molotov (6-pack) | Can’t hit flying enemies, deals underwhelming damage, and is all-around waste of your Equipment slot unless if you want a debuff for Death Mark. |
 | Primordial Cube | Even though the effect might look cool for the first couple of uses, a simple group-up tool is not enough in the current Risk of Rain 2 meta to warrant dedicating the Equipment slot. |
 | Radar Scanner | Saves you from having to look for some key pick-ups manually, and thus maybe shaves a few minutes off your run. You might get a couple of uses out of it, but this Equipment eventually ends up in the Scrapper. |
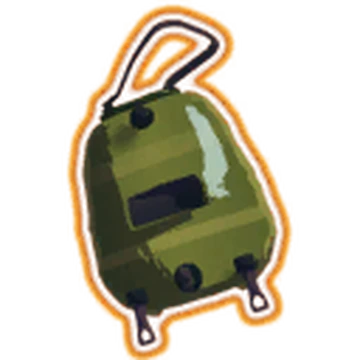
 | The Back-up | Only keep this if you have the Spare Drone Parts legendary item. Otherwise, the high cooldown and underwhelming damage make it a backup scrapper fodder for better Equipment. |
 | Gorag’s Opus | Chuck it if you are not running multiplayer or a drone build. Might be worthwhile if you are. |
In closing, we should again reiterate how fickle a tier list in a roguelite game can be. Theoretically, if things align just right, even a so-called D-tier equipment could be the best thing to happen to you in a Risk of Rain 2 run. The only way to find out is to get inside that capsule and head out!