
Salvation’s Edge is the first Raid that has made its way to Destiny 2 with The Final Shape expansion. Here you will look to seize The Witness’ monolith in an attempt to weaken his hold on the Traveller.
The Raid is a part of the main narrative, which seeks to conclude the Light and Darkness Saga, a story that was in the making for around a decade.
The Salvation’s Edge Raid is, however, a rather difficult one and it’s split into multiple encounters, with each stage featuring its own unique set of bosses.
So, here is a guide that will go over how you will be able to clear all the encounters in Destiny 2’s Salvation’s Edge.
Contents:
- All encounters in Salvation’s Edge
- Substratum guide
- Dissipation guide
- Repository guide
- Verity guide
- Zenith guide
All encounters in Destiny 2 Salvation’s Edge
The Salvation’s Edge Raid will have five encounters:
- Substratum: Gain Access to the Monolith
- Dissipation: Herald of Finality
- Repository: Carve a Path
- Verity: See Beyond
- Zenith: The Witness
How to complete Substratum encounter in Destiny 2 Salvation’s Edge
The first encounter in the Salvation’s Edge Raid is the Substratum. It will introduce a new mechanic called Resonance deposition, which you will start encountering more often in future encounters.
As you make your way into the room, you will come across a 3×3 grid. You can solve it by using the following:
| Top Left | Top | Top Right |
| Mid Left | Mid | Mid Right |
| Bottom Left | Bottom | Bottom Right |
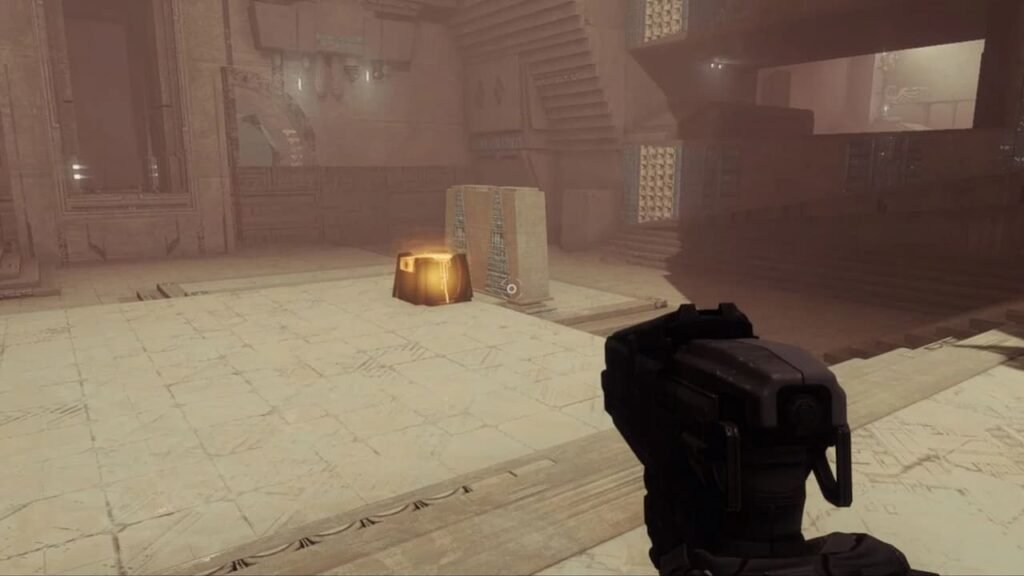
The encounter in the Substratum occurs in the Mid room, which is also where the Resonance box will spawn. The Rally Banner spot is in the room called Bottom, and you will need to use these two as reference points to mark the other rooms as you navigate to them.
Every room apart from Mid, will house a plate, two wires, and a pillar. Now, to start the encounter, all of the six players will need to make their way to the Mid room and make the Resonance spawn.
Once it does, you will need to grab it and put it in the box which is located in the middle. As soon as you do that, the encounter will start and the Witness’ hand will appear just in front of the Top room.
A timer will also be displayed along with the words “The Final Shape Looms”. The entrance to two rooms will open now, and the rooms that unlock will always be on the same side and adjacent to each other during the encounter.
To identify which rooms have opened, just look for Supplicants. They will be pouring out of the unlocked rooms, so once you identify it, break up into two pairs of three and head into each room.
Clear all the enemies that spawn inside the rooms, along with the shielded Hydra to gain access to the next room.
Keep going through the rooms till you come to the fourth one, where you will need to defeat an Overload Champion. When you kill one Overload Champion the other one will despawn. At this point, make a note of the room where you kill these champions.
When you’ve killed the Champion, you’ll see a text that says, “You are beckoned to the centre.” That’s when you need to head to Mid and kill the Tormentor that has spawned. After you’ve done so, a second set of rooms will open, and you’ll have to repeat the steps mentioned above, once again.
Make sure that you are taking down all the Hydras along the way. They can make things difficult during the second part of the encounter, and you don’t want the clock to run out on you after coming this far.
Once the second Tormentor and all the Hydras are dead, you will gain access to all the rooms in the area. Head back to where you killed the Overload Champions, and you will see that the plate in the room is glowing.
Both teams need to take one room each. Out of the three players, one needs to step on the glowing plate to see which channel the pulse travels to. Send a second player to that room, while the third player remains between the two rooms to help clear the ads that keep spawning here.
The main objective in this encounter to keep bouncing these pulses between these two plates to spawn Resonance. You will need to step on the plate as soon as the pulse hits to send it back. For every single pulse that you bounce between two plates, you’ll spawn one Resonance.
Do keep in mind that if you get the timing wrong when sending the signal back, then a Subjugator will spawn and you will need to start it all over again.
The room where you send the pulse to the first time has a pillar that’s glowing. You need to pick up all three Resonances, and then shoot the glowing pillar and then stand on the plate the moment the pulse hits the plate.
If you have accomplished the above steps correctly, you will notice that the pillar has started to give out a golden glow. When you successfully get the pillars in both the rooms to glow, you’ll be beckoned to the middle again and defeat the Subjugator that spawns again.
Beat it to make another Resonance box spawn, and put all of your collected resonance in it. You will need to collect a total of 12 Resonance bits. Every time you defeat the main Subjugator in the middle, the “Final Shape looming” timer will increase. The goal is to lock down all eight of the pillars so keep repeating the process till it’s done.
Each room will have four Resonance spawns. The player who stays behind to clear the ads will need to pick one up because a receiver will need to use one resonance bit to lock the pillar. Additionally, each player can pick up only three stacks of Resonance, any more and they will instantly die.
Herald of Finality: Dissipation boss guide in Destiny 2 Salvation’s Edge
For the second encounter of Salvation’s Edge, you will be tasked to defeat the Herald of Finality. This will be your first major blockade in the Raid and will serve as a DPS check for your party. Make sure your team is using their best build for this boss.
The Herald of Finality encounter can be broken down into three sections: Left, Mid, and Right. Now divide your team into three pairs of two, and head inside each of the rooms.
To start the encounter, shoot the Blight in the middle, and you will face any one of the Trammel bosses (each room will get a separate boss): Taken Ogre, Wizard, or Centurion.
Once the bosses in each room are dead, the Herald of Finality will pick one player from each team at random and then summon them to a pit. The selected player will be the only one who can damage the boss. They will also gain the “Call of the Reckoning” buff.
When the three players land a shot each on the boss, Blights will spawn, and you will have to destroy these three Blights and the boss will be damageable gain. Shoot the crit spot on its head to break it. When you do so, you’ll receive the “Stolen Favor” buff.
With the Stolen Favor buff, head back to your side of the room, and you’ll notice the pillar glowing along with the shape above it. There will be two Resonance shapes to look out for: Sphere and Pyramid.
Now, bounce the pulse between the two plates like you did in the first encounter to spawn Resonances. You’ll need a total of three Resonances which match the symbol on the pillar to close it.
Additionally, if you have obtained to Spherical Resonance, but you need a Pyramidal one, you can simply pick up a Pyramidal Resonance even after getting two Spherical Resonance. This will convert all of your charges to the Pyramidal once.
After getting the required Resonance, lock down the pillars, which will spawn a Resonance Box. Now put all of your collected Resonance in it to extend the timer you have for completing the encounter.
This will also make the Herald of Finality susceptible to damage for a brief period. So deal as much damage as you possibly can to it before it becomes invulnerable. Then rinse and repeat till you get to the final stand. Here you’ll go straight into DPS phase without going into the mechanics so make sure you go in with enough ammo to damage the boss.
How to complete Repository encounter in Destiny 2 Salvation’s Edge Raid
When you start the Repository encounter, you will need to look out for two new Resonance types: Cube and Hexahedral. The room will also have three pillars that need to be locked but there are around three levels to how you can go about doing it.
Every level will spawn a Tormentor. So the first thing you will need to do is to defeat it, which will then unlock the plates that are around the pillars. However, do keep in mind that the player who gets the final hit on the boss gets to have the “Stolen Valor” buff which will then let them see which pillar needs which Resonance symbol.
So just pick up the required Resonance and hit the pillars to lock all three of them. This will spawn a Resonance box in the middle, so deliver all of your collected Resonance bits, which will then spawn an Unstoppable Incendior along with other smaller mobs.
The Subjugator will spawn if you are not able to get to the plate on time to generate Resonances. It will stop the plate from glowing and you will need to beat the enemy and start the process all over again.
Once you’ve defeated the Unstoppable Incendior, you’ll be allowed to move to the next floor. Once you make it to the third floor and defeat the Incendior that spawns there, the encounter concludes.
How to complete Verity encounter in Destiny 2 Salvation’s Edge Raid
The Verity encounter in the Destiny 2 Salvation’s Raid encounter is one of the most complicated encounters in the game so far.
To get through this encounter easily, there are two basic things that you need to keep in mind:
- When heading into this encounter, ensure that your character looks unique, because you’ll need to identify each other.
- Ensure you have unique looking ghost shells, because that will come in handy towards last bit of the encounter.
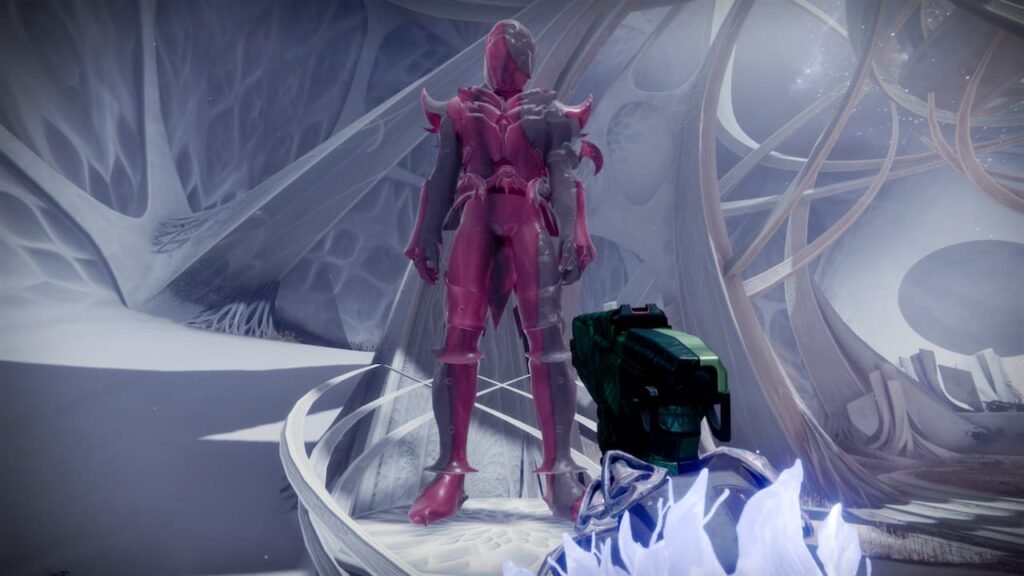
This room is filled with statues of the six Guardians of the fireteam. But, there are a total of 9 statues in here. Six are towards the back of the room, and three to the front. Guardians represented by these three statues will be transported to the Solo room.
To start the encounter, the three represented players will have to visit the front of the room and interact with the statues. When they do so, they’ll be transported into the solo rooms. These have the same layout as the group room, but there will be just one player inside.
The main goal of this encounter is to free the players in the solo room, and in order to do that, the players in the solo rooms and the group rooms will have to make a 3D shape on the statues in both the rooms.
Solo Room
In the Solo Room, you’ll see that your statue is holding a symbol. So, you’ll have to make a 3D shape by combining two 2D shapes other than the symbol that your statue is holding.
Before you do anything else, make sure you call out the shapes the three Guardians are holding from left to right. Let’s assume it’s STC for now.
For example, if your statue is holding a circle, then you’ll have to combine the Square and the Triangle to make the 3D shape. The shapes that you see on the white screen in your room are the ones that the Boomer Knights will drop when you defeat them. If any of the shapes match the one that you’re holding, you’ll have to transfer that to a different room.
Going by the previous example, assuming you have a Square on your statue and one of the shapes displayed on the screen is a Square and a Circle, you’ll have to trade the Square with a Triangle. In one of the other rooms, a player will need a Triangle but they’ll need a Square.
Once the Boomer Knights start spawning, kill them till they drop a Square. Then take it to the statue of the Guardian who needs it. Wait till they get the Triangle, and then on the count of three, interact with each other’s statues. If done correctly, you’ll see that your statue is now holding a Triangle. All you need to now do is pick up a Circle and interact with your statue and you’ll end up with the 3D shape you need.
Group Room
In the Group Room, you’ll have to make a 3D shape for all three Guardians in the solo room, but the only difference is that all three statues will be holding a 3D shape to begin with.
Based on the team callout that you’ve received from the solo rooms, you’ll have to remove that particular shape from that statue. So, what you need to do is kill the Boomer Knights and
Now, what you need to do is tell the Guardians on the outside about the shape that you’re looking to get rid of, which in this case is a Square.
Now the chosen players have a very important role to play in completing this part of the encounter. If you are one of the chosen, make sure you are making the most of the in-game chat system.
In the solo room, you will notice 2D symbols being displayed on the hands of the three Guardian statues. Now use the team chat to write the symbols down from left to right. The symbols will be a combination of squares, triangles, and circles. So if you see the symbol in this very order, you can make things simpler by writing “STC” in chat.
Now, of the three players on the outside, two will have to dedicated ad-clears, while one will be responsible for the dissection. If you’re on dissection duty, you’ll need to kill the Boomer Knight and pick up a shape they drop.
You need to then approach the statue of a Guardian who has that shape but doesn’t need it and interact with their statues. If you’ve done it right then the statue will start glowing. You need to repeat this step with another statue to complete the dissection.
When you’ve done one round of dissection, you’ll see that the 3D shapes on the statues will change. Do this for all three statues, and the Guardians stuck in the Solo Rooms will finally be able to escape in Destiny 2 Salvation’s Edge Raid.
While you’re doing this, the Witness will fake kill all three Guardians in the Solo Rooms, and their Ghosts will spawn outside. The players in the outside rooms will have to pick up the Ghost and deposit it on their respective Guardian statues at the back of the room.
But, the catch is that the three statue slots will be empty. So the dead Guardians will have to inspect the ones who are alive, because they’ll be able to see the silhouette of a dead Guardian on these glowing statues. They’ll have to then direct the players and tell them which Ghost goes to which statue.
Place all three Ghosts at their correct spot and the Guardians will spawn back in the Solo Room again. Once you’re out of the Solo Room, the Witness will do this once more, but this time, he’ll wipe five Guardians instead.
Repeat the same procedure as you did previously, and once you’ve got all five Ghosts to their respective Guardians, the encounter concludes.
How to beat The Witness in Destiny 2 Salvation’s Edge Raid’s final encounter, Zenith
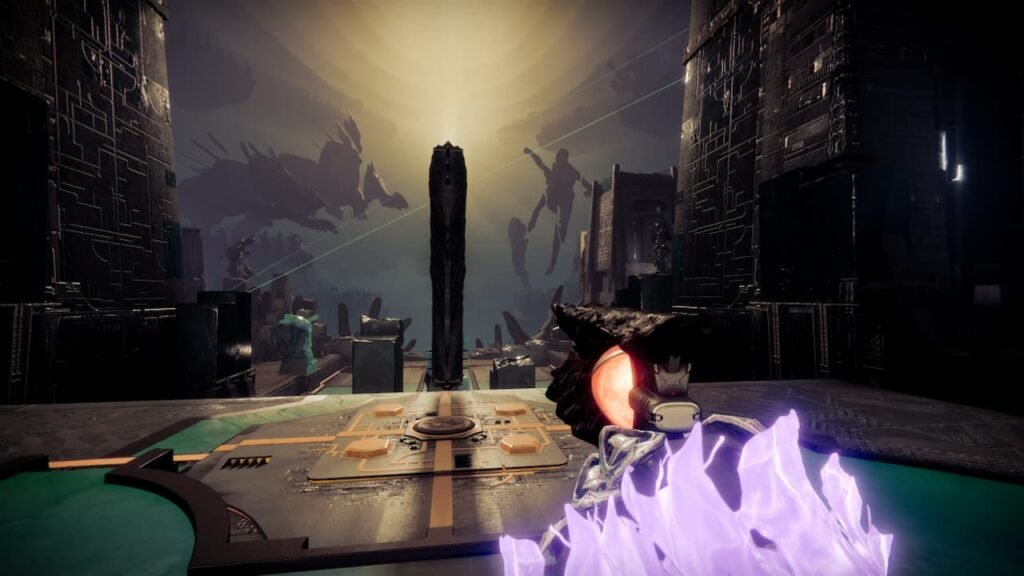
Zenith is the final encounter in Destiny 2 Salvation’s Edge Raid, where you will get to face off against The Witness.
Once the encounter starts you will need to divide your fire team into two: four Guardians who will clear ads and two Guardians who will be runners. Countless ads spawn during the encounter and those on ad-clear duty will need to make sure that the site remains clear at all times.
Runners, on the other hand, will notice three different buffs that need to be collected. Three Witness hands will spawn, one will come from the sky (Green/Triangle buff), one from the grounds (Orange/Circle buff), and another one from the wall (Square/Red buff)
Depending on the hand that spawns, a pattern will activate on the floor. You will need to step onto the pattern, and stay there a second, then leave. If you stay for too long you will die.
The goal here is to destroy the hand that spawns. So if The Witness is attacking with the Wall Hand, you will first need to shoot the bracelet on the hand and it will show you a color (red).
This will spawn a corresponding pattern on the ground. Go stand in it to collect the buff and then head back to a square attack zone and shoot the bracelet when The Witness goes for the attack again.
Breaking the bracelet will destroy the Wall Hand and you will gain the “Glyphbreaker” buff. With it head to the small island located right in front of The Witness. You will need to stand in the Fount of Light and then shoot one of the buttons on the boss.
Now as an ad-clearer, if you are in possession of a Resonance, you will need to make your way to the Fount of Light when the runner heads in after destroying a hand. This will cleanse you of the buff.
Occasionally, you will see this message displayed “The Witness tests you”. During this time the boss will start to spawn cruxes. They will come as a grid and you will need to shoot the cruxes and make the pattern of the arm that you destroyed.
The three patterns are as follows:
- Square: Shoot all the on the inside to make the shape.
- Circle: You will need to make a diamond by shooting all the cruxes on the four edges. Make sure to avoid the ones in the middle.
- Triangle: Make a Triangle by shooting all the unnecessary cruxes in front of the Witness.
If you successfully pull this off, The Witness will slam his hands on the ground, beginning the damage phase. He will be vulnerable for some time and you will need to unload as much damage on him as possible.
Failing to get the cruxes shaped correctly will completely wipe out your Fireteam and you will need to start the Zenith encounter all over again in the Destiny 2 Salvation’s Edge Raid.
Once The Witness is vulnerable to taking damage, he will not just be sitting there. He will attack you back. Here are some of his patterns that you can expect:
- Left hand glows: He will strike you with a diagonal attack which comes from the left side.
- Rigt hand glows: He will strike you with a diagonal attack which comes from the right side.
- Both hands glow: He will slam the ground. The best way to avoid it is to jump.
Once you deal enough damage, The Witness will start to move back. Make sure you disembark the central plate or you will be thrown off and killed.
You will need to complete this entire process all over again till you bring The Witness’ HP bar to zero. Once he is down you will have completed the Salvation’s Edge Raid in Bungie’s latest expansion.